 | The Stock |
There are two main jobs I wanted to do on this stock, to refinish it and pillar bed the action into it.
Refinishing:
If you own one of these rifles already then you will understand why a refinish is in order!
I won't go into the "how to" of stripping a stock as there are a ton of those already on the internet.
One thing I will mention was how I dealt with the chequering. After slopping on a good layer of paint stripper and allowing it to work I scrubbed the chequering with a stiff-bristled nail brush (no, not the one from the bathroom!).This removed the original finish and after three applications it has come up probably as clean as it is going to get with the paint stripper.
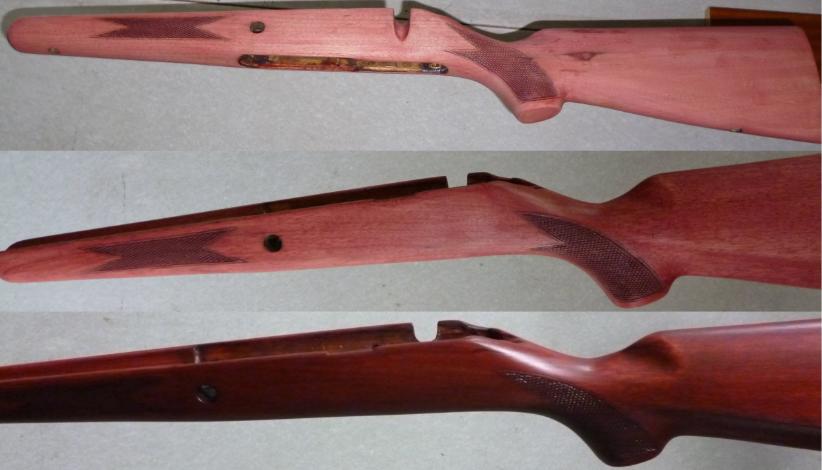
Below are photos of the stock after stripping and initial sanding with 100 then 150 grit.

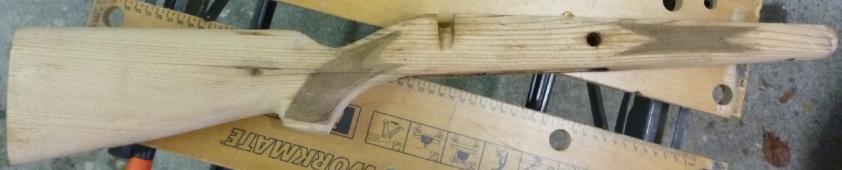
After stripping I rinsed the stock in cold water to get the residual stripper off which I then left in the hot water cupboard to dry. After the stock dried I noticed some darker patches on it. Now when I first got this rifle the whole thing was covered in some kind of greasy/waxy/cosmoliny-type of gunk. I believe these dark stains are this gunk that soaked through the original finish and into the wood.
I seem to have gotten rid of this successfully by rubbing the whole stock down numerous times with isopropyl alcohol (rubbing alcohol) which not only removes this stuff but cleans up the wood ready for final sanding pre-staining.
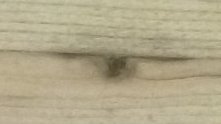
As you can see in the photo below there is an imperfection in the wood at the rear. I am planning to rectify this by collecting some of the sanding dust, mixing it with PVA glue and using it as a colour-match putty which I will then lightly sand.
Pillar Bedding:
The second task was to pillar bed the action into the stock. The choice of bedding technique is dictated by the open design of the stock inletting, there is nowhere to actually glass bed apart from the traditional first couple of inches of the barrel but seeing as the entire barrel of my rifle is free floated I decided just to machine up a couple of brass pillars and cement them into the stock at the front and rear action screws.
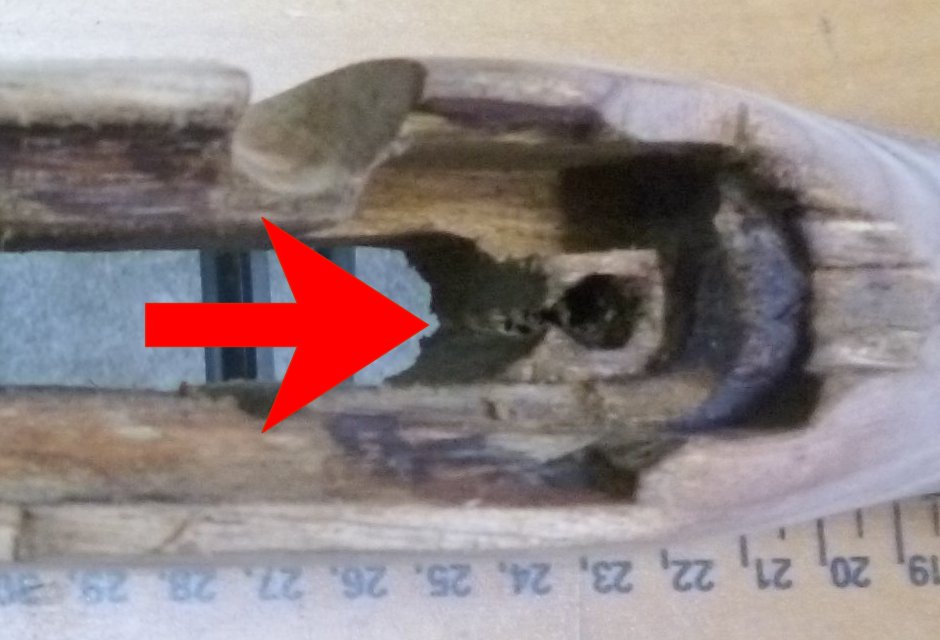
One thing I noticed on my rifle (this might not be the case on all of them) was that the hole for the rear action screw was almost breaking through the front of the wood which meant that when I drilled this hole out to accept the pillar it would go right through the wood leaving only a partial hole to cement the pillar in with.
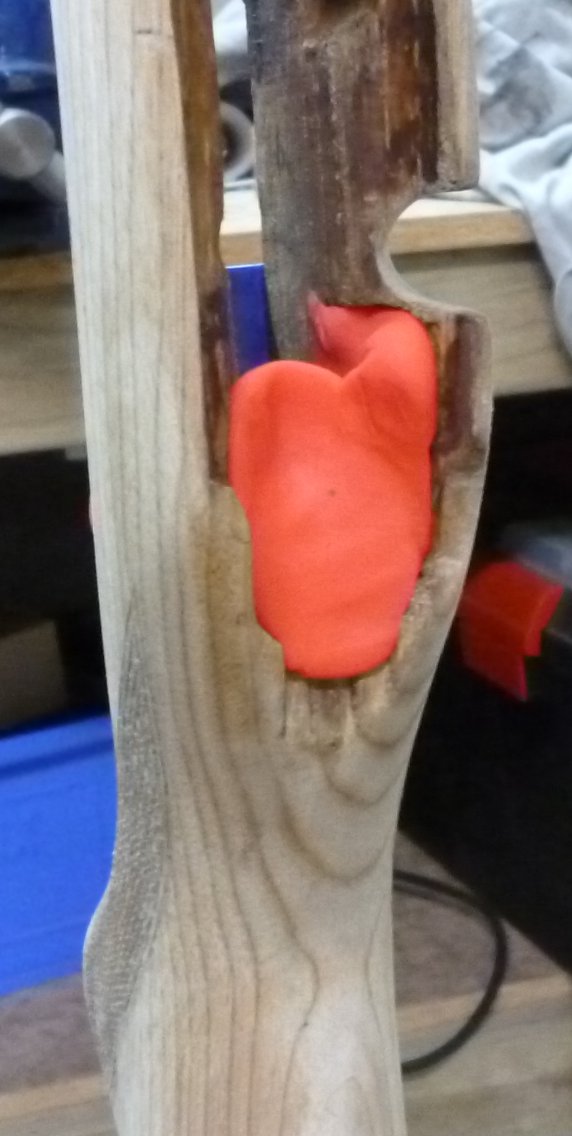
I wasn't happy that this alone would provide a solid enough foundation. To get around this I installed the pillars then stood the stock on its butt, made a "dam" with some plastic and playdoh, mixed up some resin and put less iron powder in it to leave it runnier and poured a small amount into the "dam" until it covered the exposed front of the pillar by a few millimeters.
Recoil Pad:
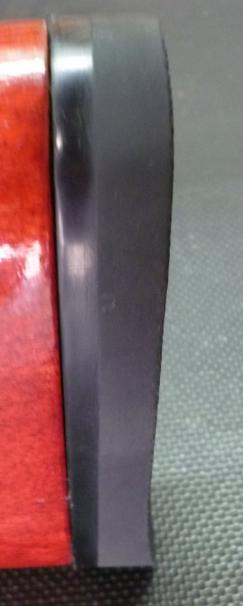
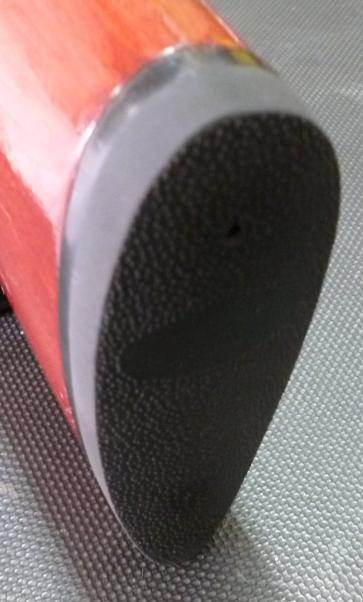
Before I went any further with the stock I got hold of a rubber recoil pad. For me the standard LOP (length of pull) on this rifle was fine so I didn't want to add too much to the length by getting a big thick pad. Also, this being an intermediate calibre it doesn't exactly need "taming" with regards recoil.
Of course I could have just stuck with the standard end cap but frankly I have never been a fan of hard shiny butt caps on any rifle and prefer the extra grip and comfort of rubber, especially when it is wet.
 |  |
Now that I had finished messing around with it I could sand the stock finer and finer until I got it down to 1200 grit.
Once you have sanded a stock down to the point where it is smooth there are all sorts of options for finishing it. Seeing as the wood these are made of is pretty plain I wanted to add some colour so I decided to stain it before applying Birchwood Casey Tru Oil gunstock finish. Frankly I am over traditional "wood" coloured stocks (unless of course it is a really nice piece of high-grade walnut or something).
After some initial "google" research I had thought to use clothing dye but further investigation found most of them have salt in them as a fixing agent for fabric and that this salt could mess up any sealer/finish I put on after.
Next to my work place is a Resene paint/colour shop so I wandered over and found the perfect solution, small 50ml test pots of wood stain (water or spirit based, I went with water as it stains darker) in a great array of colours for a couple of bucks. I applied almost the entire pot in about 13 coats as I wanted a nice rich colour. After that was done I applied 10 coats of the tru oil.
A Gotcha! Something I hadn't taken into account was reassembly. When I went to reinstall the recoil lug bolt I found the new front pillar was partially in the way. Some judicious use of a small rat tail file and the problem was solved. | 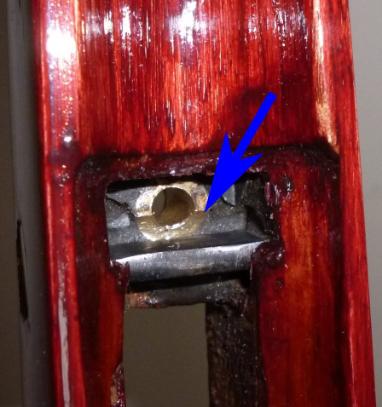 |